Table of contents
Securing a Debian 12 server requires far more than simply installing the operating system and connecting it to the internet. Most system administrators follow basic security guidelines—updating packages, enabling a firewall, and disabling root login—but overlook numerous critical hardening steps that significantly amplify security posture. These overlooked measures create exploitable gaps that sophisticated attackers actively hunt for. This comprehensive guide reveals 15 essential hardening steps that experienced system admins often miss, transforming your Debian 12 server from merely functional to genuinely hardened against modern threats.
The difference between a basic installation and a properly hardened Debian 12 server determines whether your system will survive targeted attacks or become another ransomware statistic. Each overlooked step represents an additional attack surface, a potential vulnerability, and a missed opportunity to raise security barriers before threats materialize.

The Foundation: System Updates and Package Management
Step 1: Implement Automated Security Updates with Unattended Upgrades
While most administrators run apt update and apt upgrade, fewer implement automated security patching—a critical oversight that leaves systems vulnerable between manual update windows.
Debian security patches address known vulnerabilities actively exploited by attackers. Manual updates create dangerous gaps: on a Monday morning when you run updates, a Tuesday zero-day vulnerability is already circulating among attack teams. By Tuesday evening, your system remains unpatched despite a fix existing in the Debian repositories.
Install unattended-upgrades for automatic security updates:
bashsudo apt update && sudo apt upgrade -y
sudo apt install unattended-upgrades apt-listchanges -y
sudo dpkg-reconfigure -plow unattended-upgrades
Configure automatic security updates by editing /etc/apt/apt.conf.d/50unattended-upgrades:
bashsudo nano /etc/apt/apt.conf.d/50unattended-upgrades
Ensure these critical settings are enabled:
textUnattended-Upgrade::Allowed-Origins {
    "${distro_id}:${distro_codename}-security";
};
Unattended-Upgrade::Mail "your-email@example.com";
Unattended-Upgrade::MailOnlyOnError "true";
Unattended-Upgrade::Remove-Unused-Kernel-Packages "true";
Unattended-Upgrade::AutoFixInterruptedDpkg "true";
This configuration automatically applies security updates daily, removes unused kernel packages, and emails you only when errors occur—preventing dangerous security gaps without adding administrative burden.
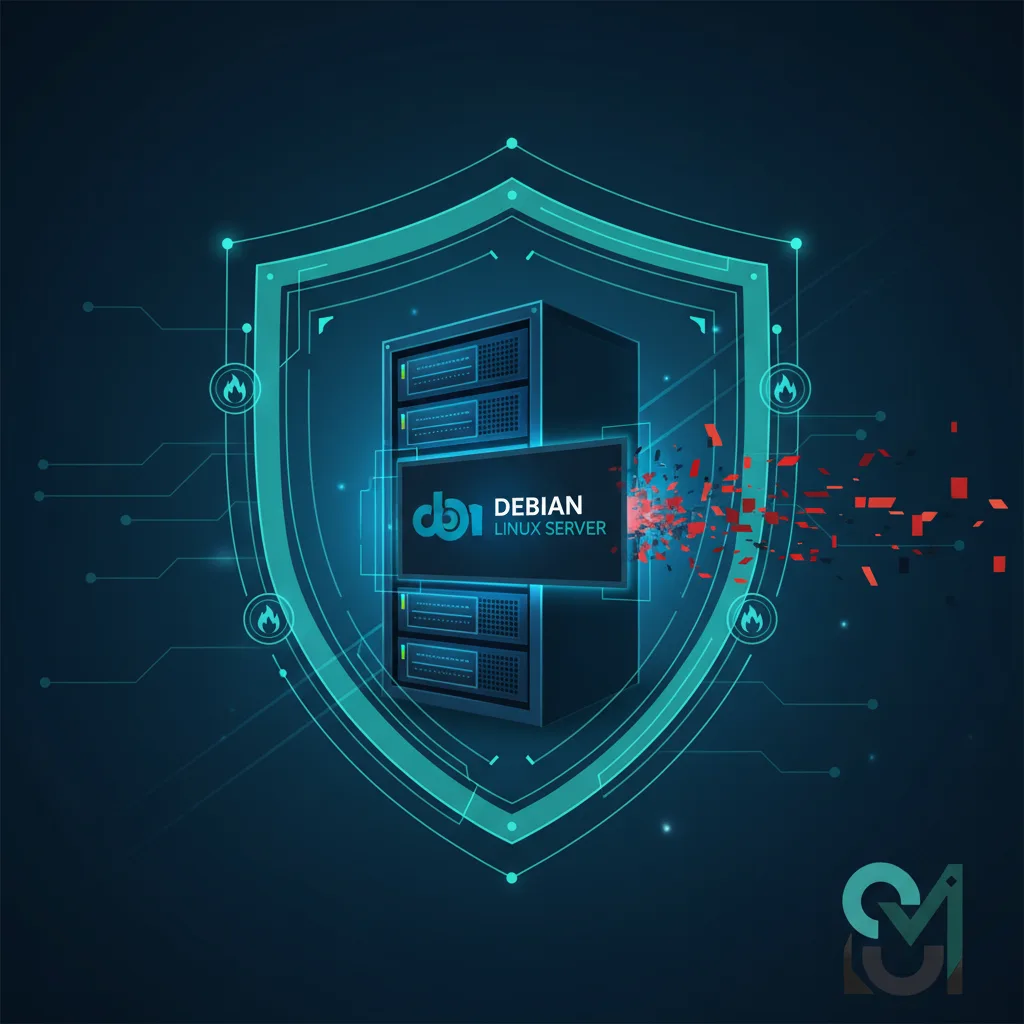
Debian 12 server security hardening with firewall protection layers
SSH Access Hardening
Step 2: Enforce SSH Key-Based Authentication (Disable Password Authentication)
Most servers have SSH password authentication enabled by default—a vulnerability that invites brute-force attacks from everywhere on the internet. Attackers use automated tools to attempt millions of password combinations nightly, and unless you use exceptionally strong passwords with fail2ban, someone will eventually succeed.
SSH key authentication is cryptographically superior: even if attackers break into your network, they cannot use stolen passwords because the server no longer accepts them.
Generate a strong SSH keypair on your local machine:
bashssh-keygen -t rsa -b 4096 -f ~/.ssh/debian_server -N "your-strong-passphrase"
Copy the public key to your server (execute this once from your local machine):
bashssh-copy-id -i ~/.ssh/debian_server.pub username@your_server_ip
Now verify key-based access works before disabling passwords:
bashssh -i ~/.ssh/debian_server username@your_server_ip
Edit the SSH daemon configuration:
bashsudo nano /etc/ssh/sshd_config
Apply these hardened SSH settings:
textProtocol 2
Port 22
AddressFamily inet
ListenAddress 0.0.0.0

PermitRootLogin no
PubkeyAuthentication yes
PasswordAuthentication no
ChallengeResponseAuthentication no
KbdInteractiveAuthentication no
UsePAM yes

PermitEmptyPasswords no
MaxAuthTries 3
MaxSessions 5
LoginGraceTime 1m
StrictModes yes
IgnoreRhosts yes
HostbasedAuthentication no
RhostsRSAAuthentication no
RSAAuthentication no

X11Forwarding no
X11UseLocalhost no

TCPKeepAlive yes
ClientAliveInterval 300
ClientAliveCountMax 2

Subsystem sftp /usr/lib/openssh/sftp-server
Restart SSH to apply changes:
bashsudo systemctl restart ssh
Test your configuration thoroughly before logging out of your current session—if misconfigured, you risk permanent lockout.
SSH key-based authentication security for secure server access
Step 3: Change SSH Port from Default 22 (Optional But Effective)
While not cryptographically necessary, changing SSH from port 22 reduces port-scan noise from automated attack tools. This is security through obscurity, useful in practice for reducing log spam and slowing casual reconnaissance.
In /etc/ssh/sshd_config, modify:
textPort 2222
Update your firewall to allow the new port:
bashsudo ufw allow 2222/tcp
sudo ufw delete allow 22/tcp
Document this change—you’ll forget it during your next emergency at 3 AM.
Step 4: Implement Fail2ban for Brute-Force Attack Prevention
Even with SSH key authentication, ancillary services (mail, web applications, etc.) may accept passwords. Fail2ban monitors failed authentication attempts and temporarily bans offending IP addresses, stopping brute-force attacks before they succeed.
Install Fail2ban:
bashsudo apt update && sudo apt install fail2ban -y
Configure Fail2ban by copying the default configuration:
bashsudo cp /etc/fail2ban/jail.conf /etc/fail2ban/jail.local
Edit the configuration:
bashsudo nano /etc/fail2ban/jail.local
In the [DEFAULT] section, configure:
text[DEFAULT]
bantime = 3600
findtime = 600
maxretry = 3
ignoreip = 127.0.0.1/8 ::1 your_trusted_ip

[sshd]
enabled = true
port = 2222
filter = sshd
logpath = /var/log/auth.log
maxretry = 3
bantime = 1800
Start and enable Fail2ban:
bashsudo systemctl enable fail2ban
sudo systemctl start fail2ban
Monitor active bans:
bashsudo fail2ban-client status sshd
This configuration bans IPs for 1800 seconds (30 minutes) after 3 failed SSH attempts within a 10-minute window—aggressive enough to stop brute-force attacks while avoiding false positives.
Firewall Configuration and Network Hardening
Step 5: Configure UFW Firewall with Strict Default Policies
Many administrators skip firewall configuration or use overly permissive rules. A properly configured firewall is your first line of defense against unauthorized access.
Install and configure UFW (Uncomplicated Firewall):
bashsudo apt update && sudo apt install ufw -y
Before enabling UFW, allow SSH to avoid lockout:
bashsudo ufw allow 2222/tcp
sudo ufw allow ssh
Set restrictive default policies:
bashsudo ufw default deny incoming
sudo ufw default allow outgoing
sudo ufw default deny routed
Enable UFW:
bashsudo ufw enable
For a web server, additionally allow HTTP and HTTPS:
bashsudo ufw allow 80/tcp
sudo ufw allow 443/tcp
Allow only specific IPs access to sensitive services:
bashsudo ufw allow from 192.168.1.100 to any port 3306
View your configuration:
bashsudo ufw status verbose
Step 6: Implement Kernel Parameter Hardening with Sysctl
System administrators rarely modify kernel parameters beyond defaults—a significant oversight. Kernel hardening through sysctl can prevent entire classes of network attacks and exploits.
Create a hardening configuration file:
bashsudo nano /etc/sysctl.d/99-hardening.conf
Add comprehensive kernel hardening parameters:
text# Network Security
net.ipv4.ip_forward = 0
net.ipv4.conf.all.send_redirects = 0
net.ipv4.conf.default.send_redirects = 0
net.ipv4.conf.all.accept_redirects = 0
net.ipv4.conf.default.accept_redirects = 0
net.ipv4.conf.all.secure_redirects = 0
net.ipv4.conf.default.secure_redirects = 0
net.ipv4.conf.all.accept_source_route = 0
net.ipv4.conf.default.accept_source_route = 0
net.ipv4.icmp_echo_ignore_all = 0
net.ipv4.icmp_echo_ignore_broadcasts = 1
net.ipv4.tcp_syncookies = 1
net.ipv4.conf.all.rp_filter = 1
net.ipv4.conf.default.rp_filter = 1

# IPv6 Security
net.ipv6.conf.all.disable_ipv6 = 0
net.ipv6.conf.all.forwarding = 0
net.ipv6.conf.all.accept_redirects = 0
net.ipv6.conf.default.accept_redirects = 0

# Memory Protection
kernel.dmesg_restrict = 1
kernel.printk = 3 3 3 3
kernel.kptr_restrict = 2
kernel.core_uses_pid = 1
kernel.kexec_load_disabled = 1
fs.protected_hardlinks = 1
fs.protected_symlinks = 1

# Process Restrictions
kernel.unprivileged_userns_clone = 0
kernel.perf_event_paranoid = 3
Apply the hardening immediately:
bashsudo sysctl -p /etc/sysctl.d/99-hardening.conf
These parameters disable IP forwarding (unless you need it), enable SYN cookies to prevent SYN flood attacks, enable reverse-path filtering to prevent IP spoofing, and implement memory protections against information disclosure.
Step 7: Disable Unnecessary Network Services
Each running service represents potential attack surface. Many default Debian installations include services you don’t need—mail servers, DNS resolvers, even Bluetooth on headless servers.
Identify running services:
bashsudo systemctl list-units --type=service --state=running
Check which services are listening on network ports:
bashsudo ss -tulnp
Disable unneeded services. For a basic web server, you likely don’t need:
bashsudo systemctl disable bluetooth.service
sudo systemctl disable cups.service
sudo systemctl disable avahi-daemon.service
sudo systemctl mask isc-dhcp-server
sudo systemctl mask isc-dhcp-server6
After disabling, stop the services:
bashsudo systemctl stop bluetooth.service
sudo systemctl stop cups.service
Document which services you disabled and why—this becomes critical during security audits.
Access Control and Authentication
Step 8: Implement Two-Factor Authentication for SSH
Two-factor authentication (2FA) adds a second security layer: even if someone obtains your SSH private key, they cannot access your server without the second factor.
Install Google Authenticator for TOTP (Time-based One-Time Password):
bashsudo apt update && sudo apt install libpam-google-authenticator -y
Configure 2FA as your user (not root):
bashgoogle-authenticator -t -f -d -w 10 -r 3 -R 30
This generates a QR code to scan with your authenticator app. Save the backup codes somewhere secure—they’re your recovery mechanism if you lose your authenticator device.
Modify PAM SSH configuration to require 2FA:
bashsudo nano /etc/pam.d/sshd
Add this line before @include common-auth:
textauth required pam_google_authenticator.so nullok
Edit SSH daemon configuration:
bashsudo nano /etc/ssh/sshd_config
Add or modify:
textChallengeResponseAuthentication yes
AuthenticationMethods publickey,keyboard-interactive
Restart SSH:
bashsudo systemctl restart ssh
Test your configuration with a new terminal before closing your current session.
Two-factor authentication securing Debian server access
Step 9: Harden User Account Policies
Default user account policies in Debian lack sufficient restrictions. Without hardening, weak password policies and account lockout mechanisms leave systems vulnerable to credential compromise.
Edit /etc/login.defs to enforce stronger password policies:
bashsudo nano /etc/login.defs
Modify these critical settings:
textPASS_MAX_DAYS   30
PASS_MIN_DAYS   1
PASS_WARN_AGE   7
LOGIN_RETRIES   3
LOGIN_TIMEOUT   60
FAILLOG_ENAB    yes
LOG_UNKFAIL_ENAB yes
LOG_OK_LOGINS    yes
SYSLOG_SU_ENAB   yes
Disable unnecessary user accounts:
bashsudo passwd -l games
sudo passwd -l news
sudo passwd -l uucp
Create a strong sudo configuration requiring passwords and auditing sudo usage:
bashsudo visudo
Ensure these lines exist:
textDefaults use_pty
Defaults log_input, log_output
Defaults requirepass
%sudo ALL=(ALL:ALL) ALL
This forces sudo commands into a pseudo-terminal, logs all input/output, and requires password authentication for privilege escalation.
Monitoring, Auditing, and Intrusion Detection
Step 10: Implement Comprehensive Logging with Auditd
Most administrators rely solely on syslog, missing detailed security events that auditd captures. Auditd provides granular audit trails essential for forensic investigations and compliance.
Install auditd:
bashsudo apt update && sudo apt install auditd audispd-plugins -y
Configure auditd by editing /etc/audit/rules.d/audit.rules:
bashsudo nano /etc/audit/rules.d/audit.rules
Add critical audit rules:
text# Remove any existing rules
-D

# Buffer Size
-b 8192

# Failure Mode
-f 2

# Audit the audit logs
-w /var/log/audit/ -k auditlog

# Audit system administration
-w /etc/sudoers -p wa -k sudoers
-w /etc/sudoers.d/ -p wa -k sudoers

# Audit system calls
-a always,exit -F arch=b64 -S execve -k exec
-a always,exit -F arch=b32 -S execve -k exec

# Audit file modifications
-w /etc/passwd -p wa -k identity
-w /etc/group -p wa -k identity

# Make the configuration immutable
-e 2
Load the audit rules:
bashsudo systemctl restart auditd
View audit logs:
bashsudo ausearch -m EXECVE --start recent
Generate audit reports:
bashsudo aureport
Auditd generates massive logs—configure log rotation to prevent disk space issues.
Step 11: Install Rootkit and Malware Detection Tools
Many administrators assume their systems are malware-free because nothing seems obviously wrong. Sophisticated rootkits hide their presence while maintaining attacker access.
Install rootkit hunter:
bashsudo apt update && sudo apt install rkhunter -y
sudo rkhunter --update
sudo rkhunter --check --skip-warning
Install chkrootkit for second-opinion malware detection:
bashsudo apt install chkrootkit -y
sudo chkrootkit
Install AIDE (Advanced Intrusion Detection Environment) for file integrity monitoring:
bashsudo apt install aide aide-common -y
sudo aideinit
sudo cp /var/lib/aide/aide.db.new /var/lib/aide/aide.db
sudo aide --check
Schedule weekly scans via cron:
bashsudo nano /etc/cron.d/rootkit-checks
Add:
text0 2 * * 0 root /usr/bin/rkhunter --check --skip-warning 2>&1 | mail -s "Weekly rootkit check" your@email.com
0 3 * * 0 root /usr/bin/aide --check 2>&1 | mail -s "Weekly AIDE check" your@email.com
These tools alert you to rootkits and malware before they establish persistence.
Step 12: Enable and Monitor System Logs
System administrators often have syslog running but never actually review the logs. Logs are only useful if you actively monitor them.
Configure rsyslog for comprehensive logging:
bashsudo nano /etc/rsyslog.conf
Ensure critical modules are enabled:
textmodule(load="imuxsock")
module(load="imklog")
module(load="imtcp")

input(type="imtcp" port="514")
Configure log rotation with logrotate:
bashsudo nano /etc/logrotate.d/rsyslog
Ensure proper rotation:
text/var/log/syslog {
    daily
    rotate 14
    compress
    delaycompress
    notifempty
    create 0640 syslog adm
    sharedscripts
    postrotate
        /usr/lib/rsyslog/rsyslog-rotate
    endscript
}
Install and configure logwatch for daily log summaries:
bashsudo apt install logwatch -y
sudo nano /etc/logwatch/conf/logwatch.conf
Configure email delivery:
textOutput = mail
Format = html
Email = your@email.com
Hostname = your-server-name
Access Control and Privilege Management

Step 13: Implement and Enforce Mandatory Access Control
Standard Linux permission systems (DAC) lack the granularity to prevent compromised applications from damaging the system. AppArmor provides profile-based mandatory access control (MAC) protecting against lateral movement after compromise.
Debian includes AppArmor by default but often with minimal profiles loaded. Verify AppArmor is active:
bashsudo aa-status
Install additional AppArmor profiles:
bashsudo apt install apparmor-profiles apparmor-profiles-extra apparmor-utils -y
Reload profiles:
bashsudo systemctl reload apparmor
Verify protection is active:
bashsudo aa-status | grep "profiles in enforce mode"
Create custom AppArmor profiles for sensitive applications:
bashsudo aa-genprof /usr/bin/your-application
AppArmor confines applications to their intended resources, preventing compromised web servers from accessing system files or database configuration.
Step 14: Configure Secure File Permissions and Umask
Default file permissions in Debian allow unnecessary read access. Proper umask configuration prevents sensitive files from being world-readable.
Check current umask:
bashumask
Set secure defaults in /etc/profile.d/ for all users:
bashsudo nano /etc/profile.d/secure-umask.sh
Add:
textif [ $UID -ge 1000 ]; then
    umask 0077
else
    umask 0027
fi
Make it executable:
bashsudo chmod 644 /etc/profile.d/secure-umask.sh
Audit current file permissions for world-readable sensitive files:
bashsudo find /etc -type f -perm -444 -exec ls -l {} \;
sudo find /home -type f -perm -444 -exec ls -l {} \;
Remove unnecessary read permissions:
bashsudo chmod 600 /etc/ssh/sshd_config
sudo chmod 640 /etc/sudoers
Step 15: Disable Unnecessary Filesystem Capabilities
Modern Linux systems grant granular capabilities to programs instead of binary root/non-root distinctions. Unnecessary capabilities on system binaries create privilege escalation paths.
Identify capabilities on system binaries:
bashgetcap -r /usr/bin 2>/dev/null
getcap -r /usr/sbin 2>/dev/null
Remove unnecessary capabilities (example):
bashsudo setcap -r /usr/bin/dumpcap
sudo setcap -r /usr/bin/chsh
Document which capabilities are necessary for your applications and remove the rest—each one represents potential privilege escalation if exploited.
Continuous Hardening and Maintenance
After implementing these 15 hardening steps, security becomes an ongoing process:
Monthly Tasks: Review audit logs for anomalies, check Fail2ban bans for patterns, update kernel parameters as needed, verify AppArmor profiles are functioning.
Quarterly Tasks: Run full rootkit scans, review firewall rules for unnecessary exceptions, audit user accounts for inactive access, check for deprecated services that can be disabled.
Annually: Perform comprehensive security audits using tools like Lynis, review and update all security policies, test disaster recovery procedures, update incident response plans.
Conclusion
The difference between a vulnerable Debian 12 server and a hardened one lies in executing these 15 steps that many system administrators overlook. From automated security updates and SSH key hardening to kernel parameter tuning, comprehensive logging, and continuous monitoring, each measure addresses specific attack vectors that sophisticated attackers exploit daily.
Start with the foundational steps—updating automatically, enforcing SSH key authentication, configuring your firewall, and enabling 2FA. Then progress through monitoring and intrusion detection. Don’t attempt to implement everything simultaneously; phased hardening prevents configuration errors and allows you to understand each component. Document your changes thoroughly, test configurations before deploying to production, and maintain regular monitoring practices.
Your Debian 12 server will never be 100% secure—security is a continuous journey, not a destination. But by implementing these 15 hardening steps, you eliminate the low-hanging fruit that automated attacks exploit and establish defenses sophisticated enough to repel all but the most determined and well-resourced adversaries.